


Tashoven Fırın Nasıl Kullanılır?
Fırınınız, kubbe ve alt tabla olmak üzere iki ana parçadan oluşmaktadır. Alt tabla, pişirme işleminin ana unsurudur ve ısı iletimi ile pişirmeyi sağlamaktadır. Kubbe, fırın içi ısısının tutulmasını sağladığı gibi, kubbe tavanındaki ısının pişirilecek yemeğin yüzeyine yansımasını sağlamaktadır.
Lezzetli bir yemek yapmak için kaliteli malzemeler kullanmak kadar, pişirme tekniği de çok önemlidir. Her türlü gıdayı en lezzetli şekilde pişirmek için yüksek ısıya ihtiyacınız vardır. Yüksek ısı altıda yapılan pişirmede, gıdaların içerisindeki lezzetlerin içerisinde kalması sağlanır. Tashoven Fırın iyi bir pişirme için gerekli yüksek ısıyı sağladığı gibi, pişireceğiniz yemeğin her tarafına ısının işlemesi sağlayarak, kısa sürede lezzetli yiyecekler yapmanızı sağlayacaktır.
Tashoven Nasıl Çalışır?
Tashoven’ın ağzından giren soğuk hava, fırın içindeki alevin yanmasını sağlarken ısınıp kubbe etrafında dolaşarak bacadan dışarıya tahliye olur. Bu fiziksel bir çevrimdir. Fırın ağızından giren soğuk hava, fırın alt tabanını soğutma eğilimindedir.
Fırın kapağı kapatılmaz ve ateş beslenmez ise, fırın ağzından giren soğuk hava fırın tabanını soğutmaya başlayacaktır. Fırın tabanının pişirmenin ana unsuru olduğu unutulmamalıdır. Fırın kapağı kapatılmadan sabit sıcaklıkta bir taban ısısı için, belirli aralıklarla fırın odun ile takviye edilmelidir.
Fırın kapağı yarım kapalı tutularak, bacadan kaçan sıcak havanın kaçışı azaltılabilir. Bu fırın içi ateşin daha az beslenerek, sabit sıcaklıkta kalmasını sağlayacaktır.
Tashoven Fırının Konumlandırılması
Tashoven’ınınızın havanın durumuna göre konumlandırılması, başarılı bir pişirmede etkilidir. Kuytu, rüzgar almayan bir alanda konumlandırma, soğuk havanın fırın içerisine ağızdan dengeli girip, ısınarak bacadan çıkması demektir. Bu durum, Tashoven’ın dengeli ısınmasını sağlar. Eğer kuytu ve rüzgarsız bir bölgeye konumlandırma imkanınız yok ise, aşağıdaki yöntemlerdeki gibi konumlandırma yapılmalıdır.
1. Sakin, rüzgarsız hava şartlarında;
Tashoven’ınınızın ağzı herhangi bir yöne bakabilir.
2. Orta ve sert rüzgarlı hava şartlarında;
• Tashoven’ınınızın ağızını rüzgarın estiği yönün tam tersine gelecek şekilde konumlandırın. Sert soğuk hava fırın içine basınç ile girer ise, fırınını cebri havalanma dengesini bozar ve dengeli yanış sağlanamaz. Yanma gerçekleşse bile, soğuk hava, pişirme işinde en önemli unsur olan taban plakasının hızlı soğumasına neden olurken, alevin yandığı noktalarda da ısının çok artmasına sebep olur. Bu durum ayrıca Tashoven’ın taban plakasını şoklara maruz bırakacak ve yüzeyde çatlaklar oluşturacaktır. Şoklar sebebiyle, fırın tabanında ve kubbesinde oluşacak kılcal çatlamalar, fırınınızın işlevini yerine getirmede bir sorun teşkil etmez. Kılcal çatlamalar genleşmeden de kaynaklanabilir. Bu tür lokal kılcal çatlamalar, fırınınız soğuduğu zaman görünmez hale gelir.)
• Rüzgarlı havalarda Tashoven’ın ağzını doğru yöne doğru konumlandıramıyor iseniz; Fırınınızın seyyar kapağını kullanarak(yarım açık tutarak) fırın içine sert hava girişini engelleyebilirsiniz.
• Fırınınızın ağız açıklığı, çıkış bacasının çapından büyük olduğu için, fırın içine giren bol temiz havanın tamamı bacadan çıkamayacağı için fırın ağızından da çıkış yapacaktır. Bu durumda fırın ağızı is olacaktır. Birçok zaman ağızda oluşacak islenmenin önüne geçilemeyebilir. Tüm pişirme işlerinizi bitirdikten ve TASHOVEN tamamen soğuduktan sonra, fırın ağızını sabunlu bir bez ile silerek temizleyebilirsiniz. Fırın sıcak iken, kesinlikle ıslak bez ile temizlik yapmayınız.
Tashoven®’ın Yakılması
1. Odunların Yerleşimi
Fırınınızın giriş ağızının içinde, Şekil 1 de görüldüğü gibi, en altta iki sıra meşe odunu, üzerine ince ağaç dalları veya köknar gibi yumuşak çıtalar ile piramidal, boşluklu bir yapı oluşturun. En üste ve yanlara meşe odunlarından yerleştirin. Piramit yapının ortasına, mangal ateşleyici tabletlerden yerleştirin.
2. Ateşleme
Mangal ateşleme tabletini, uzun bir kibrit veya ocak tipi çakmak ile yakın.
3. Yanma
İnce dallar veya köknar çıtalar öncelikle yanmaya başlayacaktır. Daha kalın meşe odunlarının da tutuşması için bir müddet bekleyin.
4. Ateşi Taşıma
Ateş canlı bir şekilde yanmaya başladığı zaman, ateşi nazikçe fırınınızın ortasına doğru itin ve fırın tabanının tam ortasının ısınmasını sağlayın. Piramidal yapının bozulmamasına dikkat edin.
5. Ateşi Besleme
Fırın ortasındaki ateşin kuvvetli bir şekilde yandığını, kalın odunların tutuştuğunu gözlemleyin. Aceleci davranıp odun beslemesi yapmayın. Fazladan atacağınız odunlar, fırınınızı boğacak yanmayı geciktirecek ve fazladan duman oluşturacaktır.
Bütün odunlar verimli bir şekilde yanmaya başladığı zaman, bir veya iki adet çok kalın olmayan meşe odunun ateşin kenarlarına doğru dik açılı koyun. Unutmayın yeni atacağınız odunlar tamamen zemine konursa, yeterli oksijen girişi olmayacağından yanma yeterli olmayacak, bolca duman üretecektir.
Böyle bir durum ile karşılaşırsanız, panik yapmayın; mangal ateşleme tabletlerinden bir parça ateşleyip, duman çıkartan odunların yanına yerleştirin. Odunlar alevlendiği için duman kesilecektir.
Fırın ortasında yanmakta olan ateşe, 10-15 dakikada, bir-iki odun koyarak ateşin daha büyük olmasını ve alevlerin kubbeye kadar ulaşmasını sağlayınız. Fırınınızı ilk ateşlediğiniz andan itibaren odunların çıkartmış olduğu is kubbe tavanına yapışacak ve kubbenin siyah görünmesine sebep olacaktır.
45-60 dakika yakılan kuvvetli ateş, fırınınızın ısısını 400-450ºC’a çıkartacaktır. Bu sıcaklıklara çıkıldığını, kubbenin siyah isli tavanının beyazlaşmasından anlayabilirsiniz.
6. Pişirmeye Hazır
Fırınınızın kubbesi beyazlaştığı zaman, ateşi fırınınızın sağ veya sol yanına çekerek pişirme işlemlerine başlayabilirsiniz. Fırın tabanındaki külleri, ot fırça ile veya bir çubuğa saracağınız nemli bez ile silebilirsiniz. Tamamen ıslak bir bez ile silme işini yapmayın, fırın tabanında şok yaratırsınız ve derin çatlaklara sebebiyet verirsiniz.
Tashoven Fırın Kullanırken Uyulması Gereken Kurallar
Tashoven® üretim aşamasında temperlenmiştir. Tashoven Fırın Kullanımı için ilk etpata küçük ateş yakarak, minimum 3-4 saat süre ile 150-200ºC sıcaklıkta fırın ısıtılmalıdır. Fırının bünyesinde bulunan nemin atılması gerekmektedir.
Sadece kuru odun (meşe odunu veya benzeri sert odunlar),mangal kömürü veya briket odun kömürü gibi yakıtlar kullanılmalıdır.
Petrol türevi sıvı (benzin, mazot, fueloil, gazyağı, tiner, gaz formunda madde) gibi yakıtlar kesinlikle kullanmamalıdır.
Katı yakıtlar ya da linyit, taş kömürü gibi yakıtlar kesinlikle kullanmamalıdır. İçi ısındığı zaman (450-500ºC),kubbenin dışında ısı 80-100ºC sıcaklığındadır. Ciddi yanmalara sebebiyet verebileceğinden dolayı çıplak ten ile dokunulmamalıdır.
Çocuklarınızı fırından uzakta tutunuz.
Fırınınız sıcakken; dış veya içine su veya başka bir sıvı dökmeyiniz.
Fırın içerisine sıkıştırılmış gazlı tüp, plastik kimyasal maddeler atmayınız. Tutuşma kabiliyeti yüksek olan yanıcı maddeleri fırının yakınlarında bulundurmayınız.
TASHOVEN® dış mekan kullanımına uygundur, kesinlikle kapalı mekanda kullanmayınız.
Yağmur, kar veya donma gibi hava koşullarına karşı, kullanmadığı zaman üzerini su geçirmez bir örtü ile kapatılmalıdır.
TASHOVEN®’ı nemli bir bez ile silebilirsiniz. Temizlik için kimyasal temizlik ürünleri kullanmayınız. Kimyasal maddeler, refrakter beton içerisine emileceği için, sağlığa zararlı kalıntılar bırakabilirler.
Fırın tamamen soğuduktan sonra, içini fırça ile süpürün. Çıkan külleri bitkilerinizin toprağına dökün. Kül mükemmel bir potasyumdur ve bitkilerinizin potasyum ihtiyacını karşılar.
Fırının tabanında et yağı gibi lekeler oluşmuşsa temizlemek için uğraşmayın. TASHOVEN®’ı bir sonraki yakışınızda oluşacak yüksek ısı ile tüm yağ kalıntıları yanacak ve lekeler kaybolacaktır.
Fırınınız yanarken veya sıcakken kesinlikle yer değiştirmeyiz.
TASHOVEN® Fırınlar içerisinde su kaynatmayınız.
Sulu olan yemeklerin pişirilmesi döküm tencereler veya toprak güveçlerde yapılmalıdır ve kapakları kapalı tutulmalıdır. Bakalit, ahşap, plastik saplı (veya yanıcı) hiçbir pişirme kabı kullanmayınız.
Fırın içerisine hiçbir şekilde elinizi sokmayınız, uygun ısı koruyucu eldivenler kullanınız.
Kullanacağınız odun, mangal kömürü, briket kömür gibi katı yakıtların, kuru olmasına dikkat ediniz.
Yağmura maruz kalmış veya tamamen ıslanmış fırınınızı yakmayınız. Güneşli ve esintili bir yerde kurumasını sağlayınız. Daha sonra içerisinde küçük bir ateş yakarak, bünyesinde kalan suyun buharlaşarak çıkmasını sağlayınız. Tamamen kuruduğuna emin olduktan sonra normal yakma işlemine geçebilirsiniz.
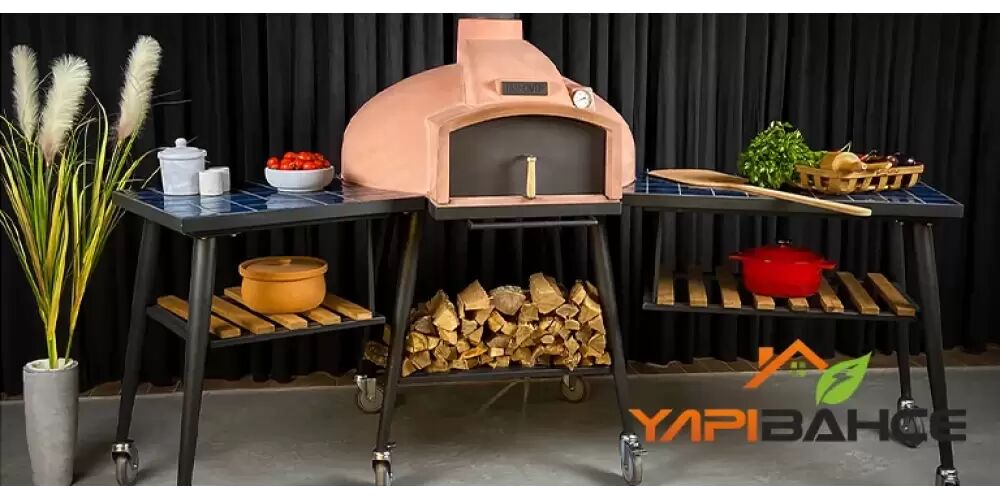
Tashoven Kurulum Kitapçığı
Tashoven® Parçalar
1. Kubbe 2. Fırın Tablası 3. Taşıyıcı Sac Gövde 4. Ayaklar 5. Raf 6. Seramik Elyaf İzolasyon 7. Baca
8. Tekerlekler 9. TASHOVEN® İzoleli Seyyar Kapak
1. Stand ayaklarını taşıyıcı sac gövdeye monte edin.
2. Ayakların arasına rafı civata ve somun ile bağlayın.
3. Tekerlekleri arka ayaklara monte edin.
4. Taşıyıcı sac gövde üzerine seramik elyaf izolasyon malzemesini yerleştirin.
5. TASHOVEN® sehpasını yere yatırın.
6. TASHOVEN® fırın tablasını, taşıyıcı sac gövdeye dik olarak yerleştirin ve fırın tablasını ön yüzünden iterek, taşıyıcı sac gövdenin içine yerleşmesini sağlayın
DİKKAT!!! Elinizi tepsi ile refrakter arasına sıkıştırmayın!
7. TASHOVEN® fırın tablasını, taşıyıcı sac gövde bölümü ile
beraber tutarak, şekildeki gibi sehpayı dik konuma getirin.
8. TASHOVEN® fırın tablasının üzerine, plakanın dairesel kısmının başladığı yere gelecek şekilde, kutudan çıkan yuvarlak sopayı yerleştirin.
9. DİKKAT!!! BU İŞLEM OLAĞANÜSTÜ DİKKAT GEREKTİRMEKTEDİR. DİKKATSİZLİK, YARALANMALARA SEBEBİYET VEREBİLİR.
Kubbeyi fırın tablası üzerine denk gelecek şekilde, yuvarlak sopanın üzerine dikkatlice yerleştirin.
(DİKKAT!!! Bu işi 2 yetişkin tarafından yapılmalıdır.)
http://assets/uploads/02-tashoven-tas-firin-kurulum1237767.jpg
10. Kubbe dış köntüre hizalanınca, (ahşap sopanın üzerinde dururken),iki kişiden biri fırının ağızından tutarak kubbeyi ahşap sopanın üzerinde dengeli bir şekilde, iterek ilerletir.
DİKKAT!!! Bu işlem yapılırken, ellerinizin veya parmaklarınızın ağırlık altında kalmamasına özen gösterin. Bu işlem sırasında koruyucu iş eldiveni kullanınız.
11. DİKKAT!!! BU İŞLEM OLAĞANÜSTÜ DİKKAT GEREKTİRMEKTEDİR. DİKKATSİZLİK, YARALANMALARA SEBEBİYET VEREBİLİR.
Kubbeyi önden dengede tutan kişi, kubbeyi hafifçe kaldırarak kubbenin arka kısmının fırın tablası tırnağına oturmasını sağlamalıdır. Kubbenin arka tarafının yerine oturduğu görüldüğü zaman, kubbeyi ön taraftan bir miktar daha kaldırıp, ikinci kişi tabla üzerindeki yuvarlak sopayı aradan çekerek çıkartılmalıdır. Yuvarlak sopa çekildikten sonra, kubbe yavaşça alt tabla üzerine oturtulmalıdır.
12. TASHOVEN® ’ın bacasını yerine takın. Seyyar kapağı fırın ağzına yerleştirin.
Tashoven Pişirme Teknikleri
İnce Hamurlu Pişirmeler
Fırınınızın kubbesi beyazlaştıktan sonra (Fırın kubbe sıcaklığı 400-450ºC’ye ulaştıktan sonra),ateşi sağa veya sola alınız. Fırın içi sıcaklığını kontrol etmek için, bir adet infrared termometre edinmenizde fayda vardır. Daha önce de bahsettiğimiz gibi, fırın taban sıcaklığı pişirme için en önemli unsurdur. Kubbesi beyazlamış fırının taban sıcaklığı muhtemelen 400ºC civarında olacaktır. İlk aşamada fırınınızda pizza, pide, lahmacun, lavaş gibi ince hamurlu ürünler pişirilir. Bu tür ince hamurluları pişirmek için taban sıcaklığının 300-360ºC olması idealdir. Taban sıcaklığı yüksek ise, belirtilen sıcaklıklara düşmesi beklenmelidir. Aşırı sıcak taban, hamurun yanmasına sebep olur. İnfrared termometre ile taban sıcaklığı kontrol edilmelidir. Eğer böyle bir termometreniz yok ise, fırın tabanına az miktarda un serpeleyin. Un hızlı bir şekilde kararıp yanıyor ise taban sıcaklığı çok yüksektir. Eğer un 1-2 dakikada kahverengileşiyor ise taban sıcaklığı uygundur. Az miktarda hazırlanmış ince hamuru fırın tabana sererek de taban sıcaklığını test edilebilirsiniz.
Fırınınızı ilk defa kullandığınızda muhtemelen, başarısız pişirmeler yapacaksınız. Panik olmayın; zamanla fırınınızı tanıyıp, mükemmel pişirmeler yapacaksınız.
Pizza, pide, lahmacun gibi ince hamurlu ürünlerin ideal pişme süresi 1,5-2 dakikadır. Bu yüzden bu tür ürünleri birer birer pişirmeniz faydalı olacaktır. İki veya daha fazla ürüne fırın içinde hakim olmak zordur. Fırın taban sıcaklığı, birbiri ardına pişireceğiniz ince hamurluların yüzeyi soğutmaya başlaması ve aynı anda içeri giren soğuk havanın etkisi ile düşmeye başlayacaktır. Kısa süreli olarak, seyyar kapağı kapatarak taban ısısının düşmesine engel olabilirsiniz veya ateşe küçük miktarlarda odun takviyesi yapılarak ısının tekrar yükselmesi sağlanabilir. Bunların hiçbirini yapmayıp, ateşin yönünü değiştirerek de istenen ısıda taban sıcaklığını elde edebilirsiniz.
Tashoven Fırında Isıya Dayanıklı Kaplarda Pişirme
Isıya dayanıklı kaplar içinde pişirme 300-250°C arası sıcaklıklarda yapılabilir. Bu iş için toprak güveçler veya döküm kaplar kullanılması tavsiye olunur. Ateşi bir kenara çekilmiş olan fırın içerisine, çiğ olarak hazırlanmış yemek, güveç içerisinde fırına sürülür. Güvecin kapağı kapalı tutulmalıdır ki, yemek kendi buharı ile pişsin. Pişirme kabının kendi kapağı yoksa kabın üzerini fırın kağıdı ile örtün ve kağıdın üzerine alüminyum folyo ile sarın. Pişirilen gıdanın cinsine göre pişirme işi 20-35 dakika sürecektir. Pişirme kabındaki yemek tamamen piştikten sonra, üzerindeki kapağı veya alüminyum folyoyu kaldırıp 5-10 dakika yemeğin üzerinin kızarmasını sağlayabilirsiniz.
Tashoven Fırında Barbekü
Tashoven Fırında Barbekü Yapmak için, fırın içindeki köz hale geçmiş odunlardan bir miktarını fırın tabanına yayın. TASHOVEN tarafından imal edilmiş özel saplı ızgarayı közün üzerine yerleştirin. Bir müddet ızgaranın ısınmasını bekleyin. Daha sonra ızgara üzerine, et, balık veya sebzeleri yerleştirin. Tashoven ile yapacağınız barbekü, klasik mangallarda yapılacak pişirmeye göre daha kısa sürede ve daha lezzetli olacaktır. Pişirilen ürün, tabandaki közlerin ısısı ile pişerken, kubbeden yansıyan ısı ile de üzerinden mühürlenecektir. Böylelikle etiniz suyunu kaybetmeyecek, odunun rayihası ile birlikte inanılmaz bir lezzete kavuşacaktır.
Tashoven Fırında Ekmek Yapımı
Dolgun ekmeklerin pişirilmesi 200-150°C arasında yapılmalıdır. Fırınınızın içindeki köz ve külleri tamamen boşaltın ve fırın içini süpürün. Ekmek hamurlarını fırın küreği ile fırın tabanına yerleştirin. Fırın içerisine sprey ile bir miktar su püskürtün ve fırın kapağını sonuna kadar iterek, bacanın irtibatını kesin. Bu şekilde ekmekleriniz 25-45 dakika içerisinde mükemmel bir şekilde pişecektir.
Yukarıda verilen bilgiler, genel bilgiler olup, kendi yaratıcılığınız ile birçok tipte pişirme yapabilirsiniz. Tashoven Fırın Satın Almak için Yapı Bahçe sitemizi her zaman ziyaret edebilirsiniz. Tashoven Fırın her durumda, size mükemmel lezzette ve sağlıklı yemekler yapmanızı sağlayacaktır. Tashoven Fırın Fiyatları için en uygun çözümler şimdi sizleri bekliyor.